Tuesday, December 1, 2009
Thursday, November 19, 2009
Videos of the DEMES


Wednesday, October 28, 2009
DEMES
With Ben we cut some already existing templates on the lasercutter. I imagine that making a drawing on ‘Solidworks’ for a DEMES frame is very complicated. The slightest design change will affect the performance. It took Ben ages to get the right shape for the motion he wanted. The DEMES is miniature which is perfect for what Ben needs to make. For artwork, the design is very small. Scale is important to me as I want the artwork to be accessible to many people. Rather than a group of people peering at a small sculpture in an exhibition space, I would prefer the artwork to be easily visible from a distance if possible. It will be a challenge to increase the scale of the DEMES to an appropriate size. For now, I will stick to what we know works!
Ben showed us all the steps to making the DEMES. Then we got it working. It is very cool. The flexible frame allows the membrane to straighten up and relax. It looks like it is flapping back and forth.
Then it was my turn. What a drama! With some frames already made and ready, it was my job to stretch the VHB. I thought stretching it on one plane was difficult. With a DEMES, in order to curl the membrane over the frame, you have to stretch in with different tensions in different directions. Super tricky. This requires a new stretcher. I found it close to impossible. The VHB kept tearing. It wants to pull away from the paddles so quickly. You have to keep your eyes and fingers on it or it breaks. I broke 3 before I managed to stick one to the strat successfully. One small victory. There is only one thing to do: practise practise practise.
Hei konei ra.
-KatyPie

Above: Cutting VHB meterial to construct our first DEMES
Above: Our first DEMES in action ( with a little help from Ben)
Above: Increasing the applied voltage increases the amount of bending motion on the DEMES
Above: Increasing the frequency increases the speed of the DEMES
Monday, October 19, 2009
Pulsing koru


Yesterday I learned how to use the computer software, ‘Solidworks’. I can use ‘Illustrator’ well enough but this seems to be a more difficult programme. I can use the programme for visualising and simulating a machine. This will be a very helpful tool. The Biomimetics Lab has its own lasercutter. Tocky taught me how to make a frame and cut it on the lasercutter.
Today, I tried making my own frames on the lasercutter using ‘Solidworks’. There are alot of things to remember. The most important rule is that all lines must have a relationship to one another. If I don’t establish a relationship between lines (ie. this line is parallel to this line) when I want to move a shape I have made, the shape won’t necessarily stay intact. However, with some coaching, I made 10 square frames.
I stretched 5 frames. Is it too early to say I have got the hang of it? Yes maybe. But at least now I think I can correct my mistakes while stretching before it’s too late and I lose the VHB to tearing. I need to come up with a better method of cutting the excess VHB from the frames. Not only are my edges really messy but the torn edges will decrease the life of the work.
I painted two koru designs free hand on one of the frames. My mini easel idea kept my hands free for painting. I then cut a mask out of the VHB backing tape. This means I can paint quickly over the whole membrane then quickly tear the backing tape away to reveal a clean picture. This is a great method except the backing tape is small. If I want to make larger frames I will need to find a masking material that can come in a larger sheet and will peel away easily from the sticky membrane.
The two koru worked well. See the vid. Tocky suggested to only paint parts of one side of the frame so the shrinkage and expansion can occur only in the parts of the design that I choose. This sounds cool. To be continued.
-KatyPie
Monday, October 12, 2009
Our first active piece
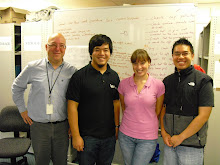
Kiaora. Welcome to the Live Sculptures blog site. The ‘Live Sculptures and Soft Machines’ team consists of me, KatyPie, with Emilio Calius and Chee Kit Wong. Helping us with engineering support is Tokushu Inamura. So who are we and what are we doing?
I’m an artist, with a special interest in Maori kowhaiwhai designs. I like to create my own stories with the language of the design. Emilio is a senior scientist in Future Materials & Structures team at IRL and Kit also works at IRL and is a research scientist, specialising in robotics and spatial cognition. Tocky is an Auckland university Biomimetics Laboratory design engineer and DE manufacturing process specialist. Phew.
We were brought together by the Smash Palace grant, provided by Creative New Zealand in partnership with the Ministry of Research, Science and Technology (MoRST). This fund is to support collaboration between artists and scientists on an art project. We want to exploit artificial muscle actuation and sensing technologies to inject the breath of life into my art through motion.
In the union of art and science, we will use EAP technology to make my original Maori kowhaiwhai (painted designs) come alive. EAP are being actively studied for applications in bio-engineering and bio-robotics because of their potential for mimicking the movements of live beings. When electrically stimulated, polymers that can shrink, expand or change shape are classified as electro-active polymers (EAP) and are also known as artificial muscles because their characteristics are closer to that of biological muscle than any other smart material or conventional actuation technology. When a large electric field is applied, charge attractions and repulsions give rise to significant planar expansion and thickness contraction. In KatyPie speak, that means a polymer membrane that has been stretched onto a plastic frame, is coated on both sides with a black grease in various designs. Electrodes are added and charge applied. The membrane tenses and relaxes as the charge flows, causing the black grease designs to shrink and grow. As you can see in our first video, the designs appear to pulse.
The application of self actuating robotic materials to Kowhaiwhai design is a novel method for connecting the past to the present, which we believe will give people a deeper regard for the traditional by presenting it in a modern way.
Ultimately we aim to create an active sculpture for exhibition at public art galleries nationwide.
For the first couple of months of the project I will be trained how to use the new technology. This should be interesting! I am usually pretty capable with different kinds of materials and tools, but this is a whole new thing altogether. Stick with me and I’ll let you know how I get on.
Thanks so much for joining us on our journey. Comments, questions, and ideas are all welcome.
Hei konei ra,
KatyPie.
Short video of the first movements of our first 2-dimensional trial piece.
9/10/09
First day in the lab! We got straight down to business and created a planer dielectric elastomer (DE) motor. The hardest part of building this was stretching the VHB. This is a very viscose polymer. If I cut out a piece that is 5cm by 5cm, I can stretch it to 3 or four times the size. The problem is keeping the VHB intact while I make it bigger. I used the ‘iris’ and the ‘umbrella’ tools for stretching. I like the umbrella. I think it took 2 or 3 tries to stick the Perspex frame onto the VHB before it broke. It will get easier as I go on – I hope! I also stuck a Perspex ring to the centre of the membrane.
I adhered the copper tape electrodes easily enough then started painting the grease. That was actually harder than I thought it would be. You can’t apply too much pressure to the membrane or it might tear. And you can’t slide a dry brush over the surface or it will tear. All this while holding it dextrously in one hand.
After painting, the DE motor was ready to go. I painted 3 segments of the membrane. These expand and shrink in sequence, causing the ring in the middle to move. We could connect a crank in the middle to make it turn. The main thing is that I made my first actuating DE!
-KatyPie